Schools have the option to use headers with their email messages. Admins with "System Email" permissions will be able to edit or select headers for email templates and other career center emails.
For emails that do not use a template, there is a default header for the respective PID.
Headers are available for email messages from the Career Services office or from a specific user. They are not available for emails from students (ex. peer advising appointments) or employers.
Any email header changes can take up to 15 minutes to take place.
Email Campaigns will respect the Default Email Header for messages to both Employers/Recruiters and Candidates/Students
Transaction logs will not include the header with the text of the message.
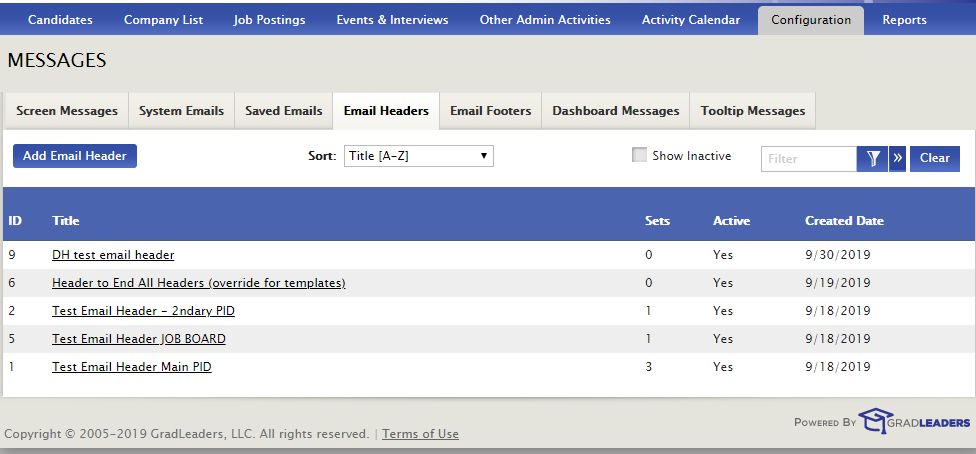
Accessing Email Headers
Access all headers at Configuration > Messages > Email Headers
To access the Email Header Page, click on the Title hyperlink. Sets indicate the number of PIDs that have this selected as a default header. Active indicates if this header can be selected in an email message.
Search is available for the title or any text in the body of the message.
Creating an Email Header
In the Messages screen (above), click on Add Email Header. This will take you to the Email Header screen.
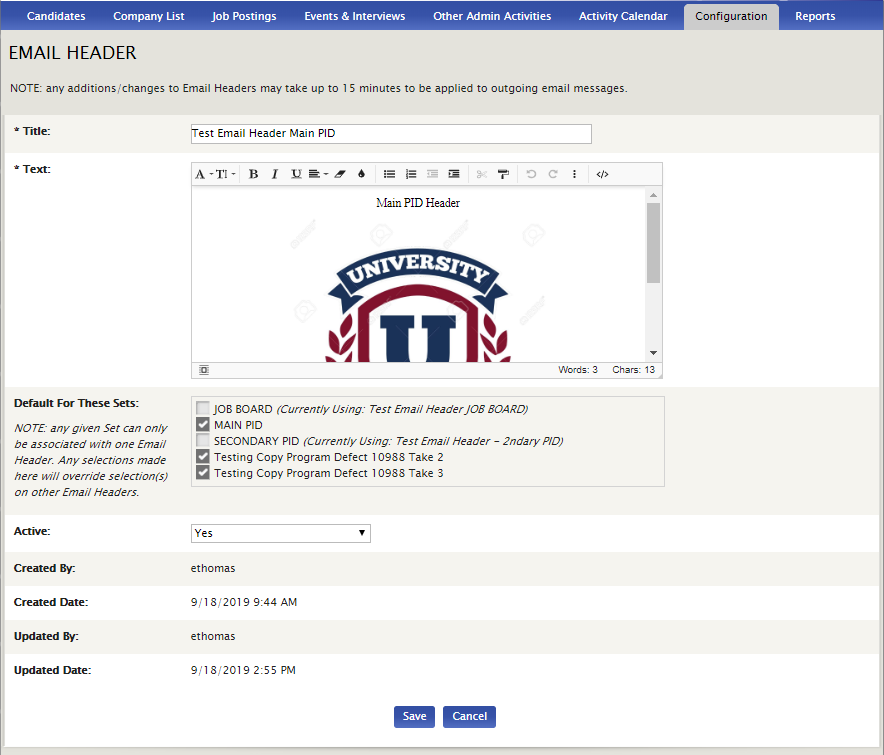
Title - name of the email header
Text - Add your header image in this text box.
HTML Guidelines for Email Headers
Default for These Sets - Lists each Set (PID). To make this header the default for that particular set, check the box next to it.
Active - indicates if this header can be used with email messages
Created by - user that added this header
Created Date - date header was created
Updated by - user that last updated this header
Updated Date - date the last update was made
Selecting Email Headers
Within the Send Emails page, there is now an option to select an Email Header. Click on the Email Header dropdown and select a header or use the Default Header (as specified above) .

To test an Email Header, select the header and complete other elements of the message that you want to see in advance. Click on Send Test Message and confirm the email address to send it to. The header will appear in that test message.
Article ID: 3479
Created On: Oct 4, 2019 at 4:10 PM
Last Updated On: Oct 7, 2019 at 9:49 AM
Authored by: Eddie Thomas
Online URL: https://kb.mbafocus.com/article.php?id=3479